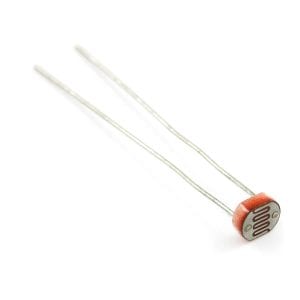
Shuyang Huang

Shuyang Huang is from Shanghai, China, and her name is pronounced Shoo-Young Huang in English. She attained a Bachelor of Science degree in Human Geography at East China Normal University. Her concentrations at GSAPP are Urban Analytics and Built Environment. In her leisure time, she has been playing cello for 14 years since ten, and was proudly titled as the Principal Cellist for her college orchestra.

Email: sh3685@columbia.edu

Cloudy Night: Activating Park Space by Illuminated Interactivity

Team

Nick Kunz: nhk2119@columbia.edu, 602-710-8608
Shiori Osakata: so2522@columbia.edu, 646-983-4947
Shuyang Huang: sh3685@columbia.edu, 347-415-4652

Video

https://youtu.be/UFdZAbp3dc4

Hero Image

Executive Summary

Cloudy Night is an interactive lighting and data collecting prototype. The device was developed to provide illuminated feedback loops in low light conditions throughout the city while collecting unidentifiable data on its participants. The intent of the project was to assess if interactive lighting could enhance public park engagement and safety. The first deployment occurred on May 4th, 2019 at Starlight Park in the Bronx, New York.

The stakeholders of the project were the Bronx River Alliance with special consideration given to the people and parks they serve. After a 3 hour deployment of the prototype in the afternoon and evening, the collected data was analyzed for quality, focusing on interpretability and inference. It was found that both directionality of human movement and the presence of children could be roughly approximated. The presence of children was used as a proxy for the perception of public safety, where it was assumed that mothers will not bring their children into environments that are perceived to be unsafe.

Although this was assumed, and a rigorous analysis was not conducted to assess the number of occurrences of each event, it was more important that this project demonstrated that capturing these areas of interest was possible. It was determined that the Cloudy Night prototype was a useful device for creating interactive illuminances, while assessing rough approximations of public park safety and human movement through both directionality and the presence of children.

Implementation

Implementation in the Starlight Park

Analysis

General Trends of Human Presence

Direction Plot (17:30 – 17:35)

Analysis of Children Presence (18:20 – 18:23)


Wind speed and direction sensor

Wind Speed and Direction Sensor

Technical description:
Whether you’re an agriculturalist, a professional meteorologist or a weather hobbyist, building your own weather station can be a really rewarding project. When you’re measuring weather, however, you need some pretty specialized sensors. This kit represents the three core components of weather measurement: wind speed, wind direction, and rainfall. The wind speed meter encodes the wind speed by simply closing a switch which each rotation. The wind vane reports wind direction as a voltage which is produced by the combination of resistors inside the sensor. The vane’s magnet may close two switches at once, allowing up to 16 different positions to be indicated.

Limitations:
None of the sensors in this kit contain active electronics, instead, they use sealed magnetic reed switches and magnets so sourcing a voltage to take any measurements is needed.
High cost — there is a cheaper alternative on Adafruit.

Alternative

Skill:
Core Skill: Electrical Prototyping
Skill Level: Noob

Sample Sensor:
weather meters
https://www.sparkfun.com/products/8942

Sample Exercise and basic codes:
Assembly guide:
https://learn.sparkfun.com/tutorials/weather-meter-hookup-guide?_ga=2.188083949.434451597.1551129096-109088928.1551129095&_gac=1.242428342.1551146477.EAIaIQobChMIuJ2b26bY4AIVwVmGCh3qzgD4EAAYASAAEgI5ZfD_BwE#hardware-assembly

Proximity sensor

Proximity Sensor

Proximity Sensor

Technical description:
The sensor is a nice way to add a small-distance proximity sensor to your microcontroller project. It is designed for much shorter distances, no more than 200mm (about 7.5″) and experimentation shows that it worked best at distances of about 10-150mm. It would be good for say detecting when a hand moved nearby, or before a robot smacks into a wall. The sensor also has an ambient light sensor built in.
The sensor uses an infrared LED to bounce light off objects in front of it and time how fast it takes for the light to return. With the sensor, it is easy to read the proximity (i.e. if an object is near or far) and even ambient light level over a simple I2C connection.

Limitations:
It can only use for short distances, no more than 200mm (about 7.5″).

Skill:
Core Skill: Electrical Prototyping
Skill Level: Noob

Sample Sensor:
VCNL4010 Proximity/Light sensor
https://www.adafruit.com/product/466

Sample Exercise and basic codes:
Use in Arduino
https://learn.adafruit.com/using-vcnl4010-proximity-sensor/arduino


Small Light sensor

Small Light sensor

Technical description:
This is a very small light sensor. A photocell changes (also called a photodetector, photoresistor, CdS or photoconductive cell) resistance depending on the amount of light it is exposed to.  As more light shines of the sensor’s head, the resistance between its two terminals decreases. These little sensors make great ambient light triggers (when a light in the room turns on, do something). They’re easy-to-use, and an essential component in projects that require ambient-light sensing.

Limitations:
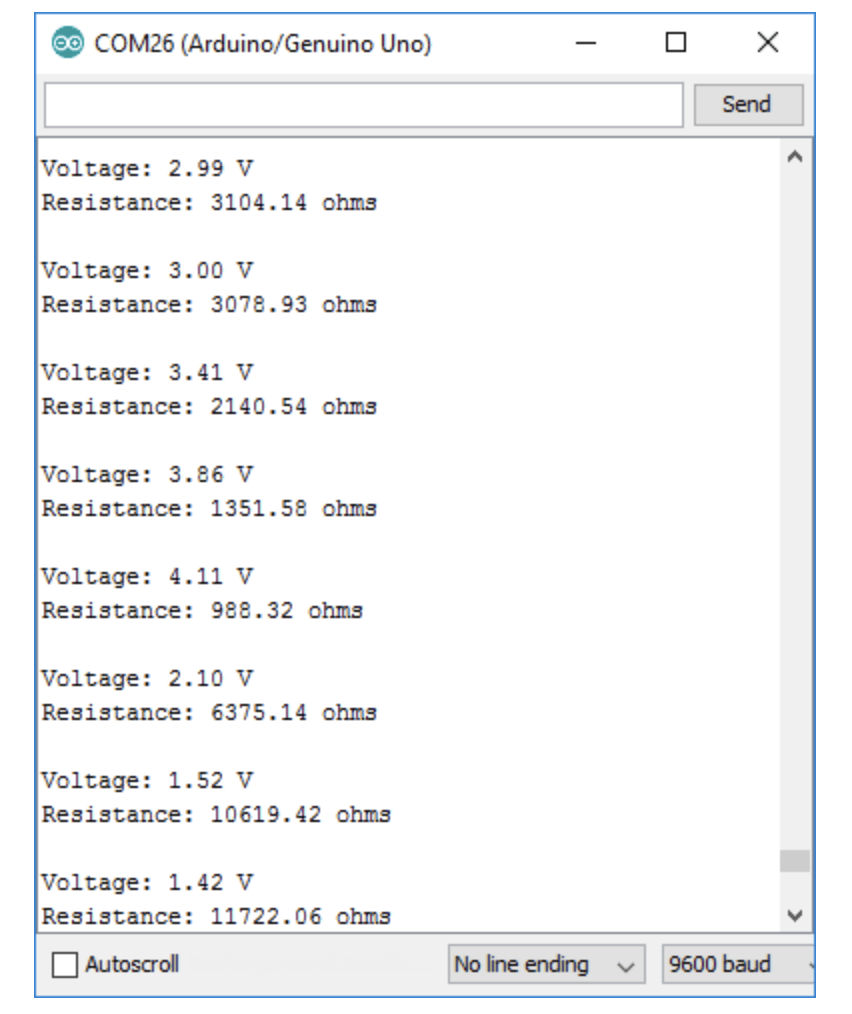
Photocells only use resistance as a way to illustrate the luminosity which is not straightforward. If it gets darker, the resistance should go up. If it gets lighter, the resistance should go down. (see below)
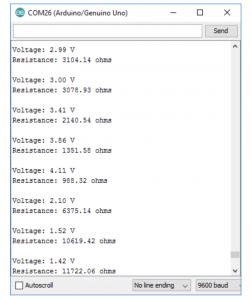
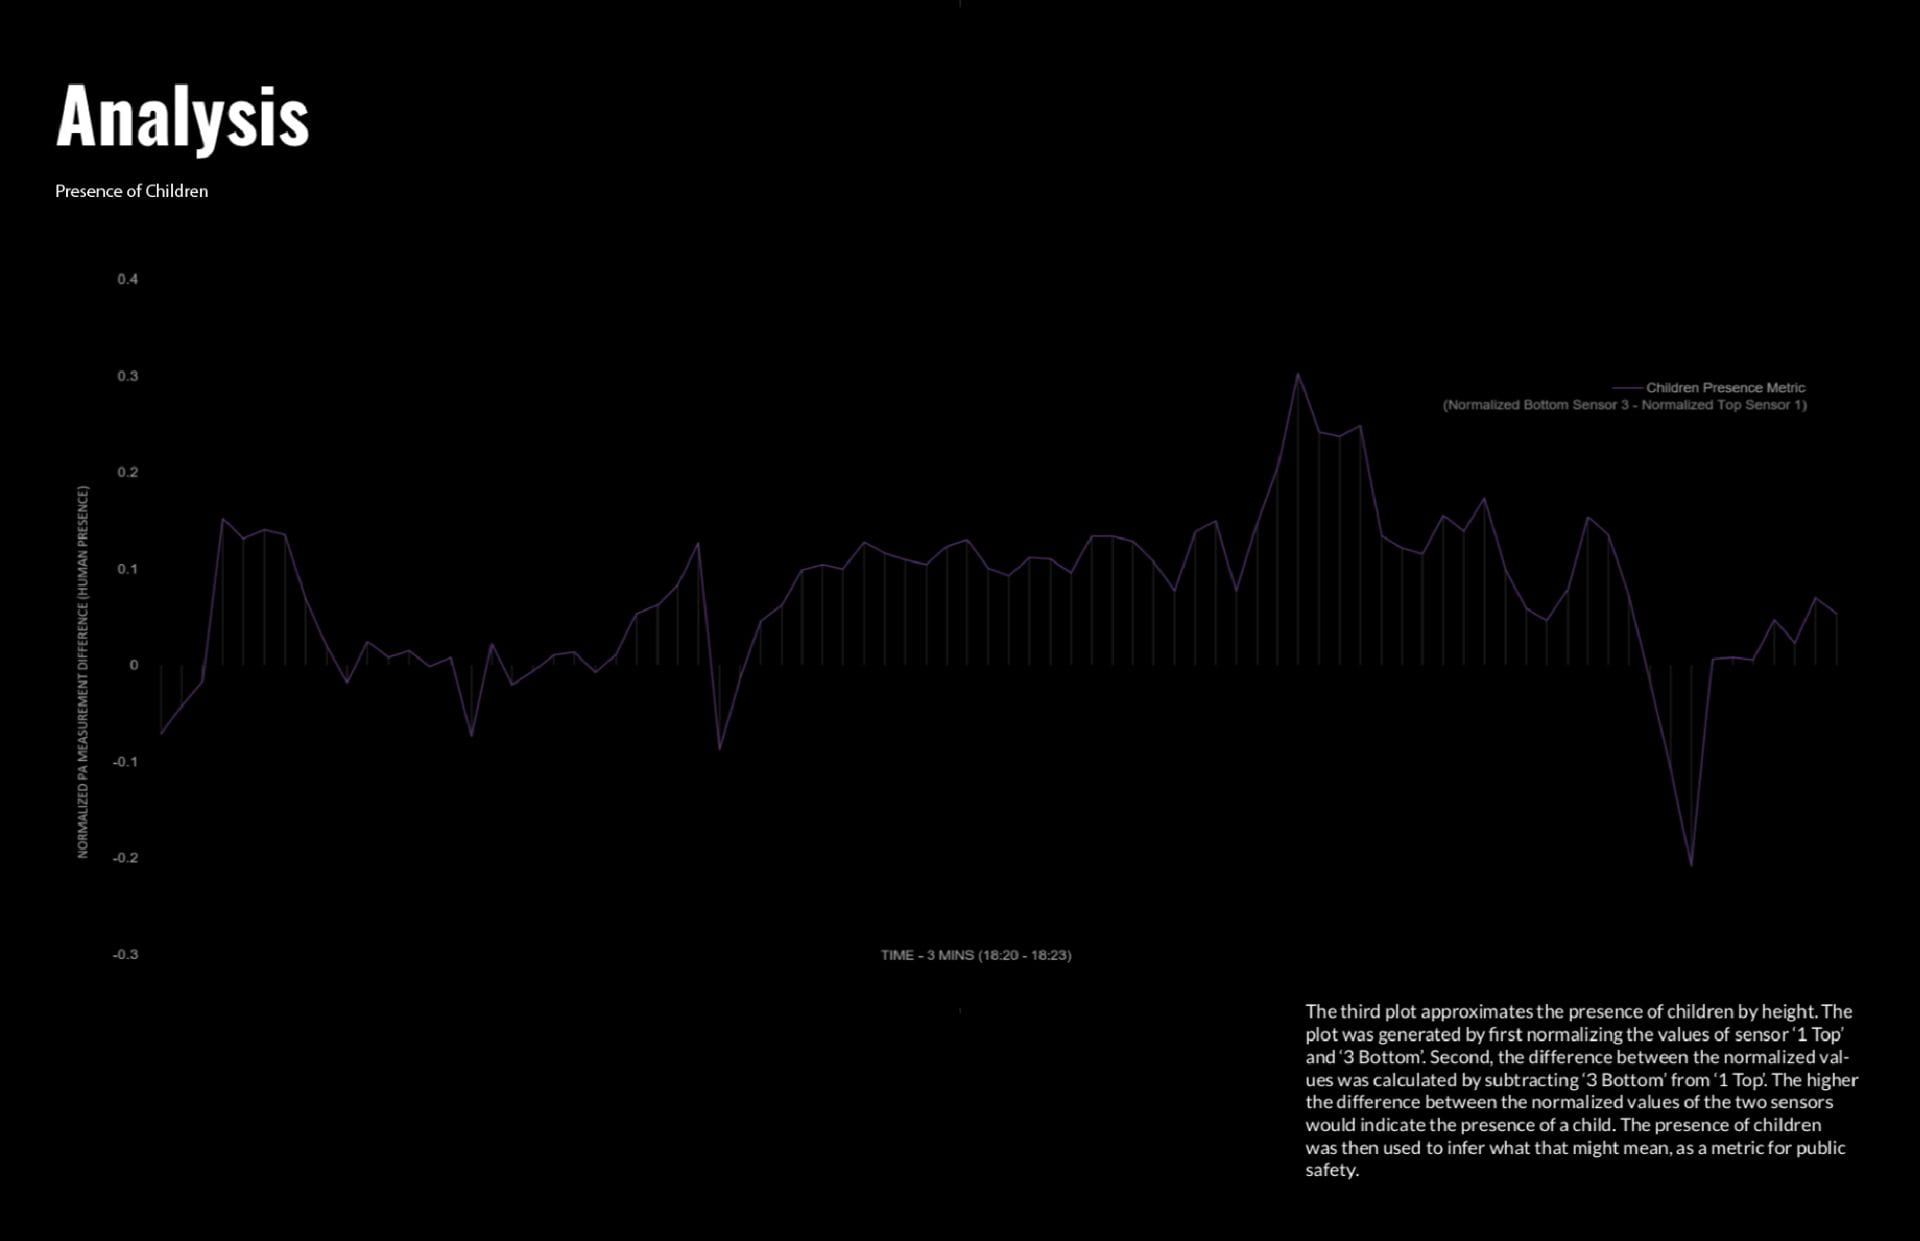
Result Displayed

To get a more accurate result, go to the digital light sensor

Photocells are light-sensitive, variable resistors. To turn the photocell’s variable resistance into a readable voltage, we’ll combine it with a static resistor to create a voltage divider.
Resistor kit

Skill:
Core Skill: Electrical Prototyping
Skill Level: Noob

Sample Sensor:
Mini Photocell
https://www.sparkfun.com/products/9088?_ga=2.172429030.434451597.1551129096-109088928.1551129095&_gac=1.3998340.1551129096.EAIaIQobChMInZT4kubX4AIVmI3ICh3h3AdNEAAYASAAEgJgtvD_BwE

Sample Exercise and basic codes:
Example codes
https://learn.sparkfun.com/tutorials/photocell-hookup-guide?_ga=2.184362339.434451597.1551129096-109088928.1551129095&_gac=1.49623058.1551129096.EAIaIQobChMInZT4kubX4AIVmI3ICh3h3AdNEAAYASAAEgJgtvD_BwE#example-program

Water Acidity Sensor

Water Acidity Sensor

Technical description:
It is a simple device that can be used to measure the acidity and basicity of liquids. This sensor can be used in a multitude of applications including acid-base titrations, pH monitoring in home aquariums, analysis of water quality in lakes and streams, and more.

Limitations:
This sensor can only function in a temperature range of 5 to 80°C.
Specific interface and software should be bought to visualize and read the result.

Skill:
Core skill: Electrical Prototyping
Skill level: Noob

Sample Sensor:
Vernier Sensor – pH Sensor
https://www.sparkfun.com/products/12872

Sample Exercise and basic codes:
Experiments and Lab Ideas
https://www.vernier.com/products/sensors/ph-sensors/ph-bta/#section5

Soil moisture sensor

Soil moisture sensor

Technical description:
The SparkFun Soil Moisture Sensor is a simple breakout for measuring the moisture in soil and similar materials. The soil moisture sensor is pretty straightforward to use. The two large, exposed pads function as probes for the sensor, together acting as a variable resistor. The more water that is in the soil means the better the conductivity between the pads will be, resulting in lower resistance and a higher SIG out. This version of the Soil Moisture Sensor includes a 3-pin screw pin terminal pre-soldered to the board for easy wiring and setup.

Limitations:
It has a short lifespan when exposed to a moist environment. To prevent corrosion of the probes, it is recommended not to power the sensor constantly, and to only power it when you take a reading.

Skill:
Core Skill: Programming
Skill Level: Rookie
All you will need is to connect the VCC and GND pins to your Arduino-based device (or compatible development board). You will receive a SIG out, which will depend on the amount of water in the soil.

Sample Sensor:
SparkFun Soil Moisture Sensor (with Screw Terminals)
https://www.sparkfun.com/products/13637

Sample Exercise and basic codes:
Soil Moisture Sensing Project
https://learn.sparkfun.com/tutorials/soil-moisture-sensor-hookup-guide?_ga=2.171976806.434451597.1551129096-109088928.1551129095&_gac=1.174720406.1551129096.EAIaIQobChMInZT4kubX4AIVmI3ICh3h3AdNEAAYASAAEgJgtvD_BwE#soil-moisture-sensing-project
Eagle file
https://cdn.sparkfun.com/datasheets/Sensors/Biometric/SparkFun_Soil_Moisture_Sensor.pdf